
A Modern Inspired Ikea Play Kitchen Makeover
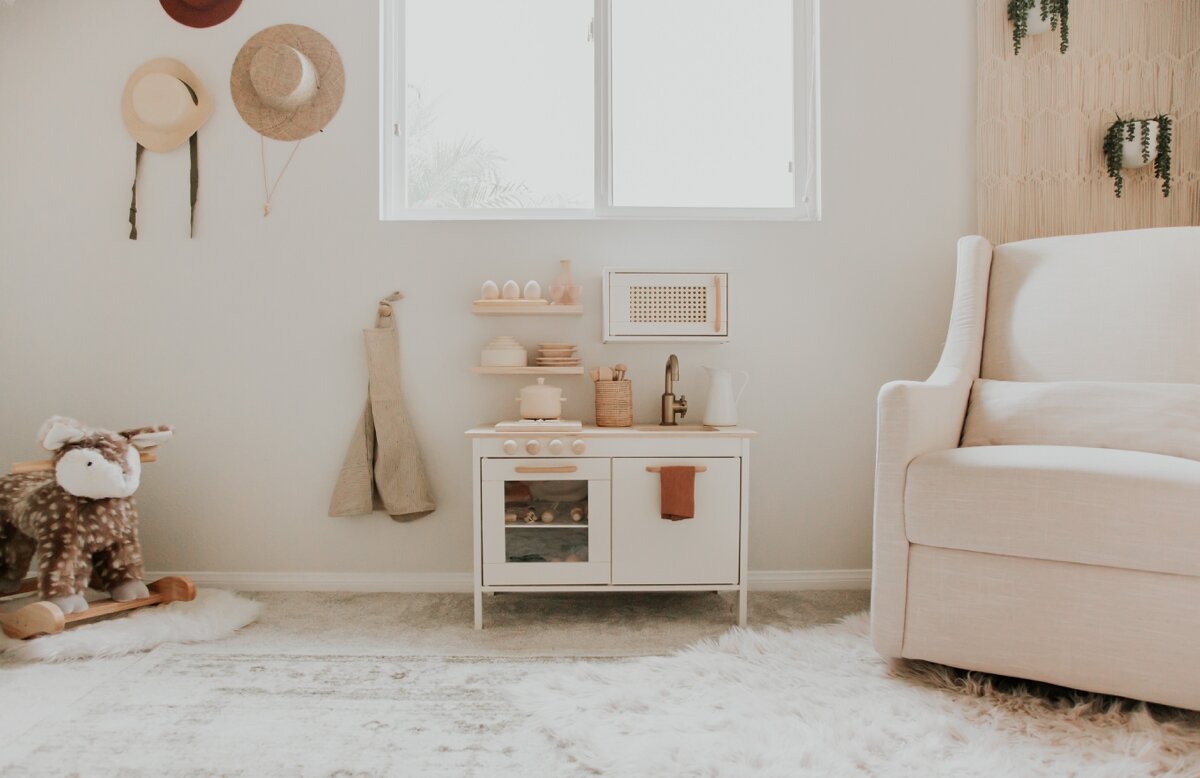
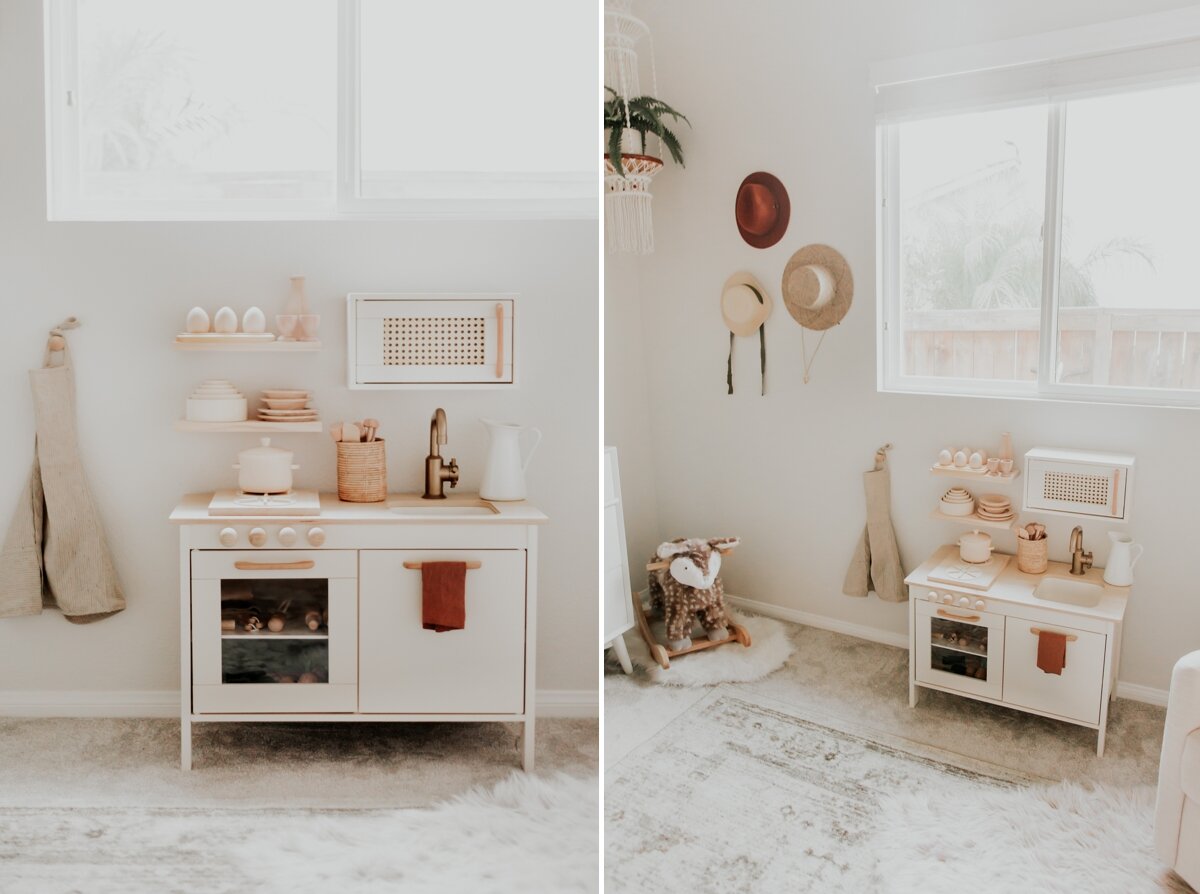
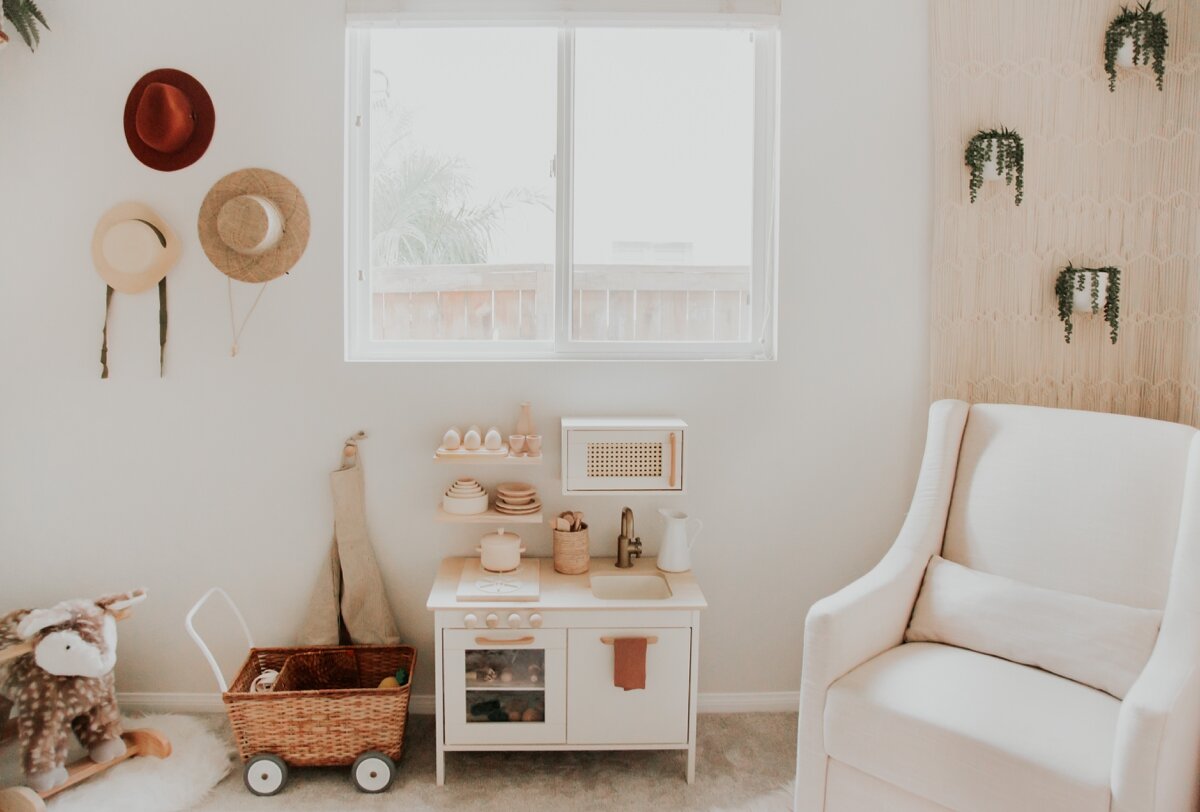
I am so thrilled to be sharing more about this Ikea play kitchen makeover with you guys! This was a fun project we, (and when I say “we” I mostly mean Dan LOL), did for Juniper as her Christmas present and we couldn’t wait to set it up in her room with all the fun kitchen accessories. We’ve been loving watching her imagination grow as she stirs, whisks up and cooks some yummy treats and then goes “mmmm”. I foresee so many fun moments with this set up for years to come because I know it’s such a fun toy for many ages!
So let’s get into more details about what we did to go from this… to this!

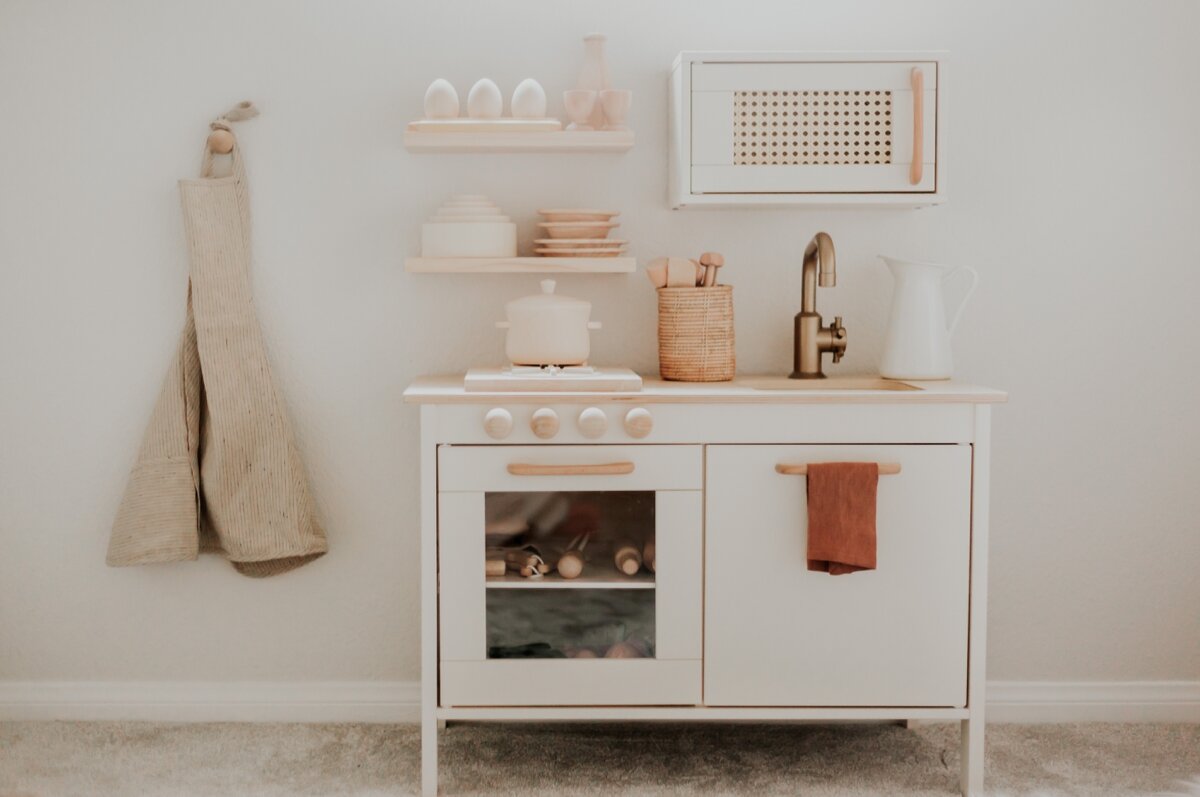
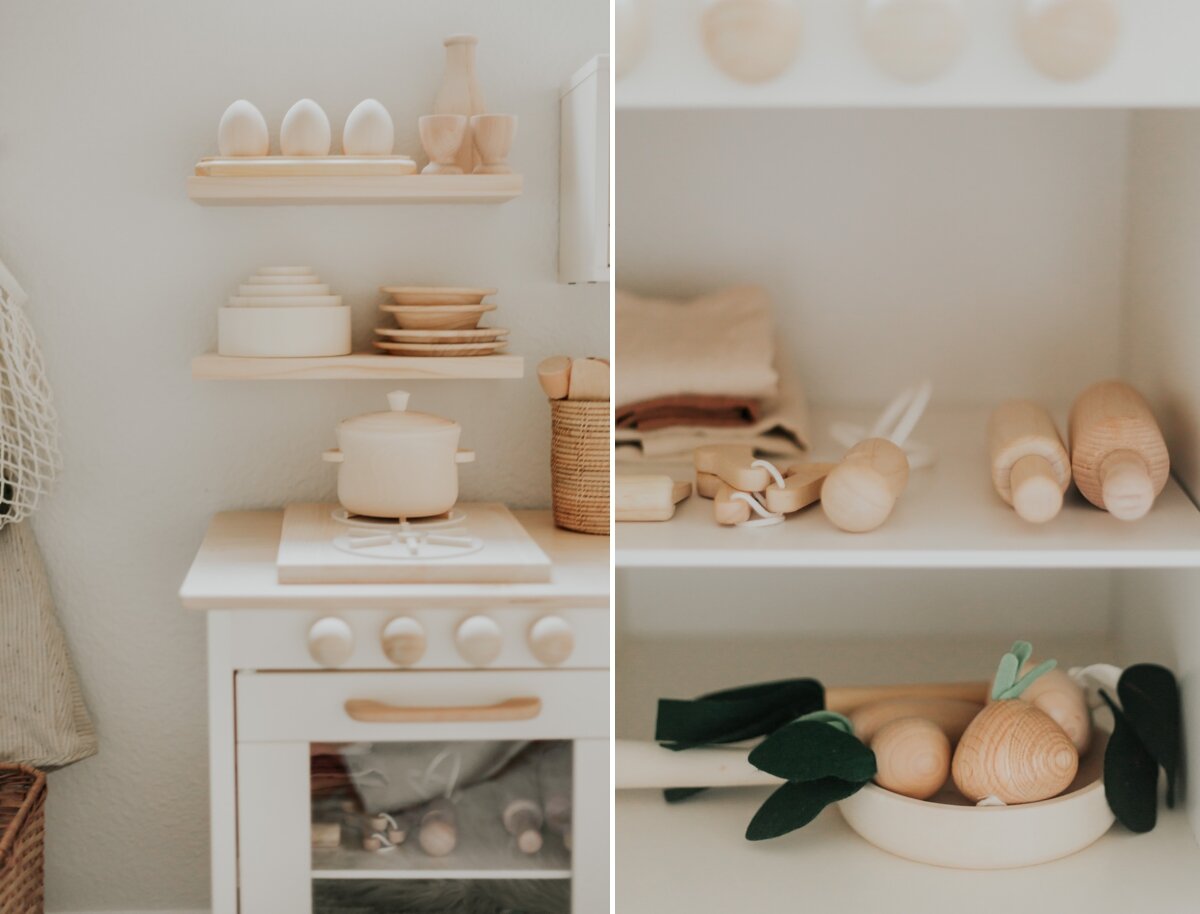
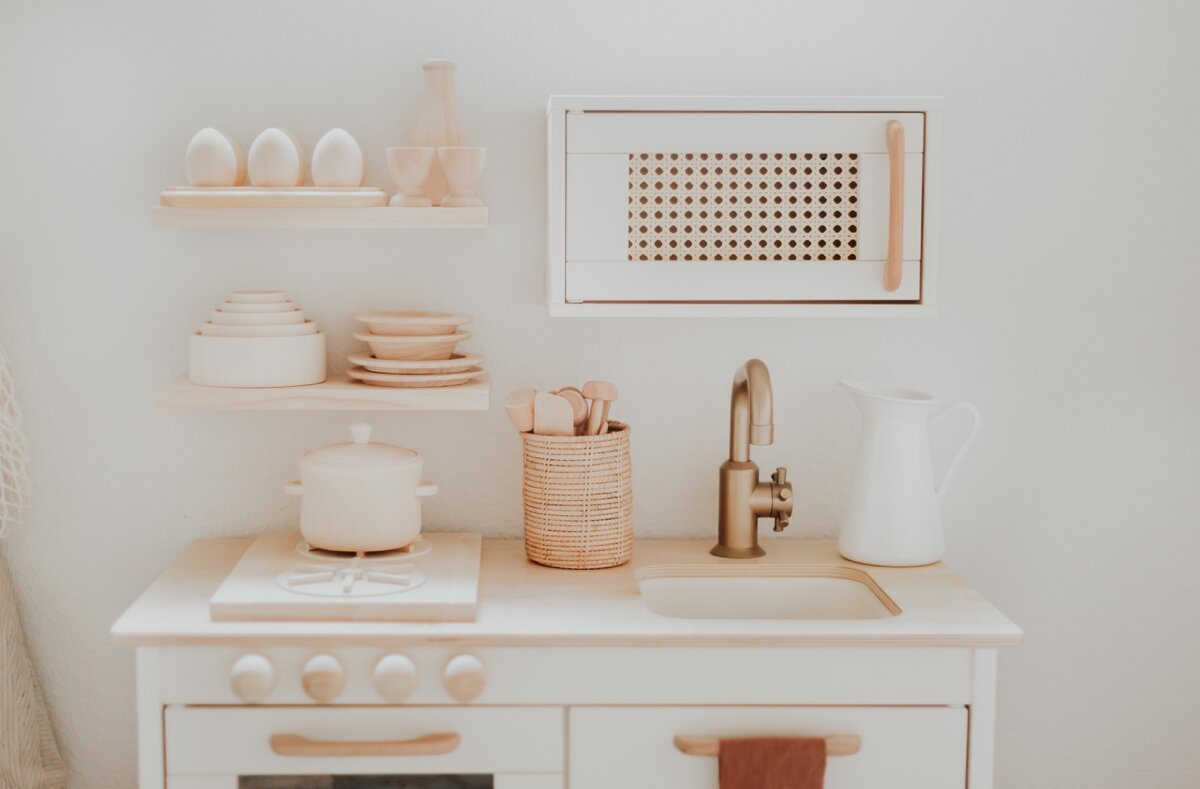
When going into this kitchen makeover, I knew I wanted it to be an open kitchen concept with open floating shelving as well as having the microwave made into a whole separate piece to mount to the wall on its own. I wanted to stick with neutral colors that fit in well with her room and accessories that she would love to play with.
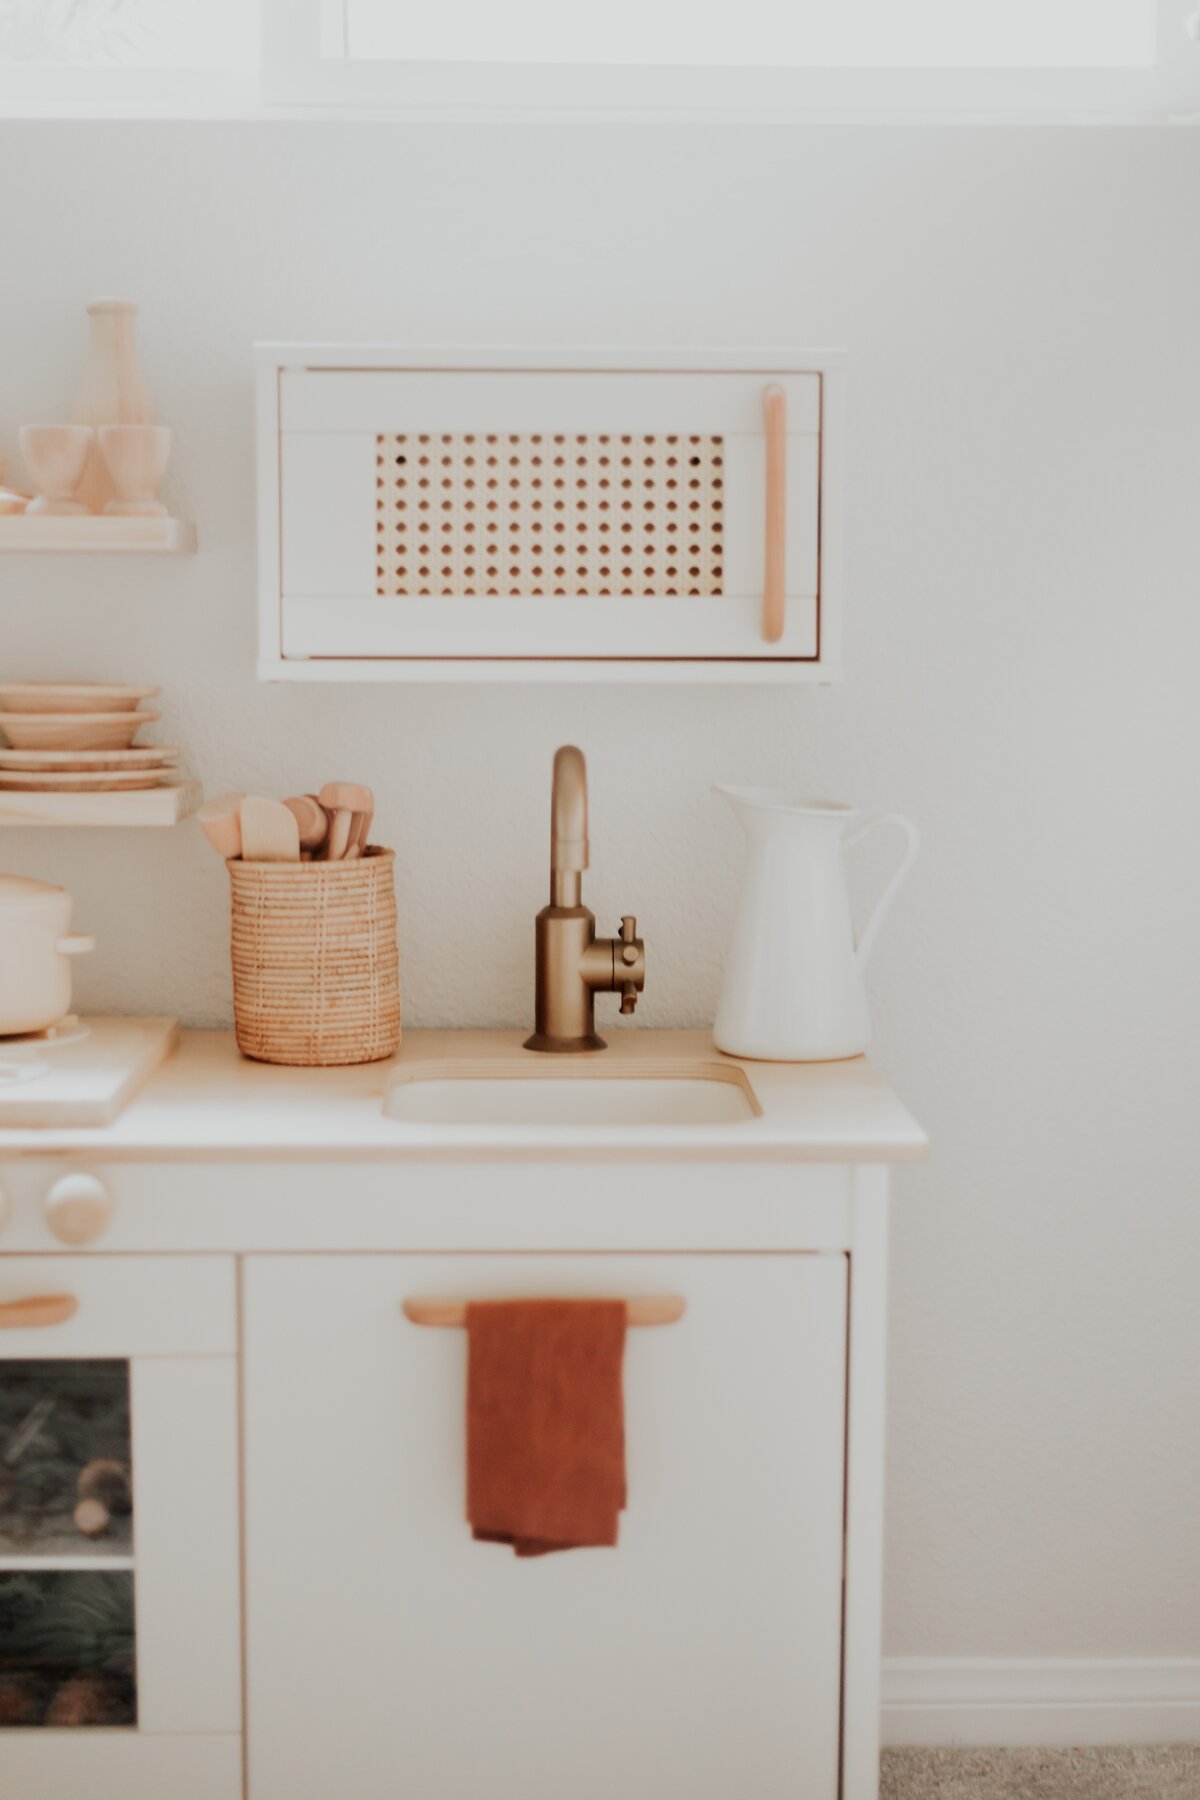
So we started out by painting all the pieces we needed too. We used the heirloom white spray paint for the majority of the kitchen, (all items and color names are linked at the end of the blog post). We made sure the paint we got had primer in it already so we didn’t have to do any sanding or priming. We started by painting the wood sides and the front panel. We taped off the clear window part on the doors and painted those as well. There are pieces on the inside when you open the doors like the shelves, we chose to keep those the white they already were since we were pressed for time and figured we can always go back and paint that later if we wanted to.
We did three full coats on all these pieces. We also painted the sink this same color. When painting the sink faucet we stood it up on a screw in a piece of wood so we could paint it while it was standing up to make sure the coats got on evenly and we didn’t have to lay it on its side.
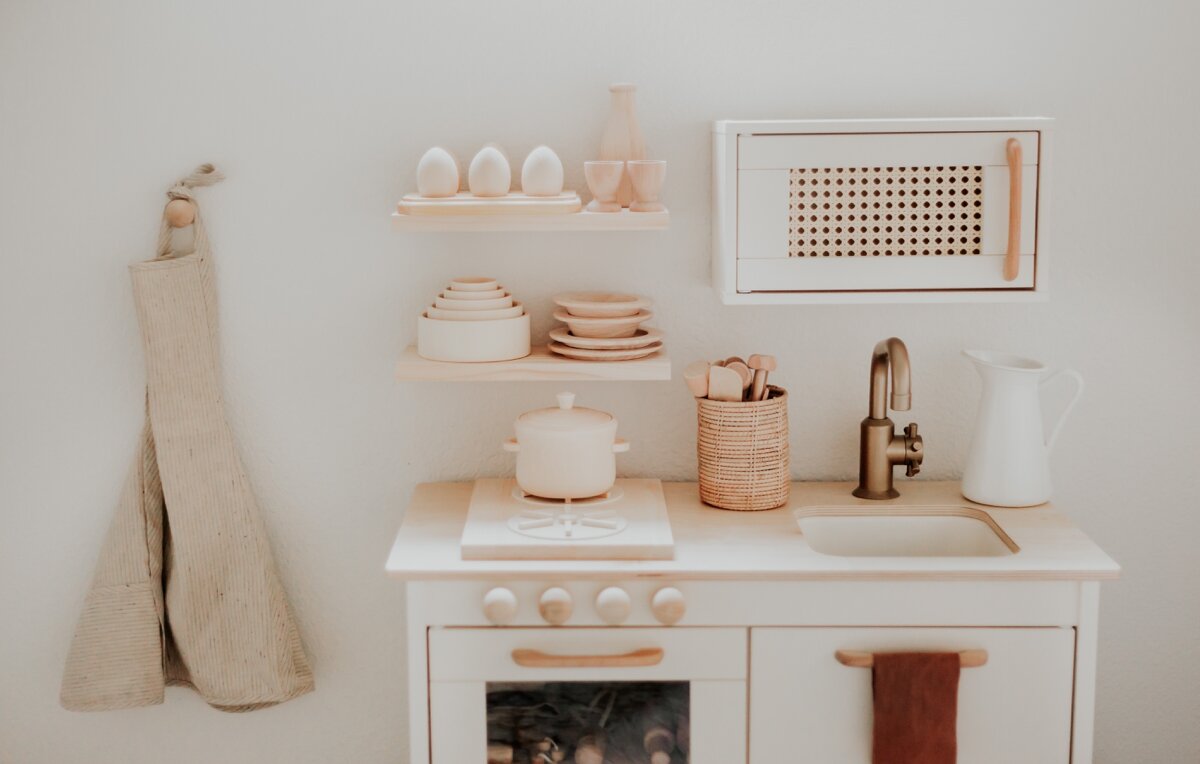
After the paint was dry, we were ready to put it all together! We added the wooden handles to the doors, and the knobs to the front panel. We put together the pieces per Ikea instructions except we mounted the sink underneath instead and we left the whole top part of the kitchen off. On the wood countertop there were a couple little holes from where the top part should have been so we filled in those spots with tiny dowels to make the countertop look more flush with out any holes.

Now that the kitchen is all put together, lets talk about the DIY stove top! Everything we used and the sizes for the wood pieces are all linked and talked about at the end of the post, but here is how we did it.


First of all, I was super inspired by Lindy from Thimble and Cloth and her DIY stove top which you can find HERE. I purchased the same wood slab that she had used and then we made our own version of a stove top. For the wood slab I purchased, it isn’t a straight cut of wood, it had ridges so we decided to cut it down and make the slab smaller with no ridges. We then took two of the thin round pieces of wood we purchased and spray painted them the same color white as the kitchen to match.
For the burner pieces we bought a 1/4 inch thick square dowel strip and cut twelve pieces 1.5 inch long (six per burner). We also purchased a 3/4 inch dowel strip and cut two pieces 1/4 inch thick to match the thickness of the burner rectangle pieces.
Once we had all the pieces we measured and glued everything in place how we wanted it using wood glue. (Please keep in mind that these pieces are smaller and there is always a chance that they might pop off due to playing. If a younger child or baby is playing it should be supervised and made aware of just in case for safety purposes).
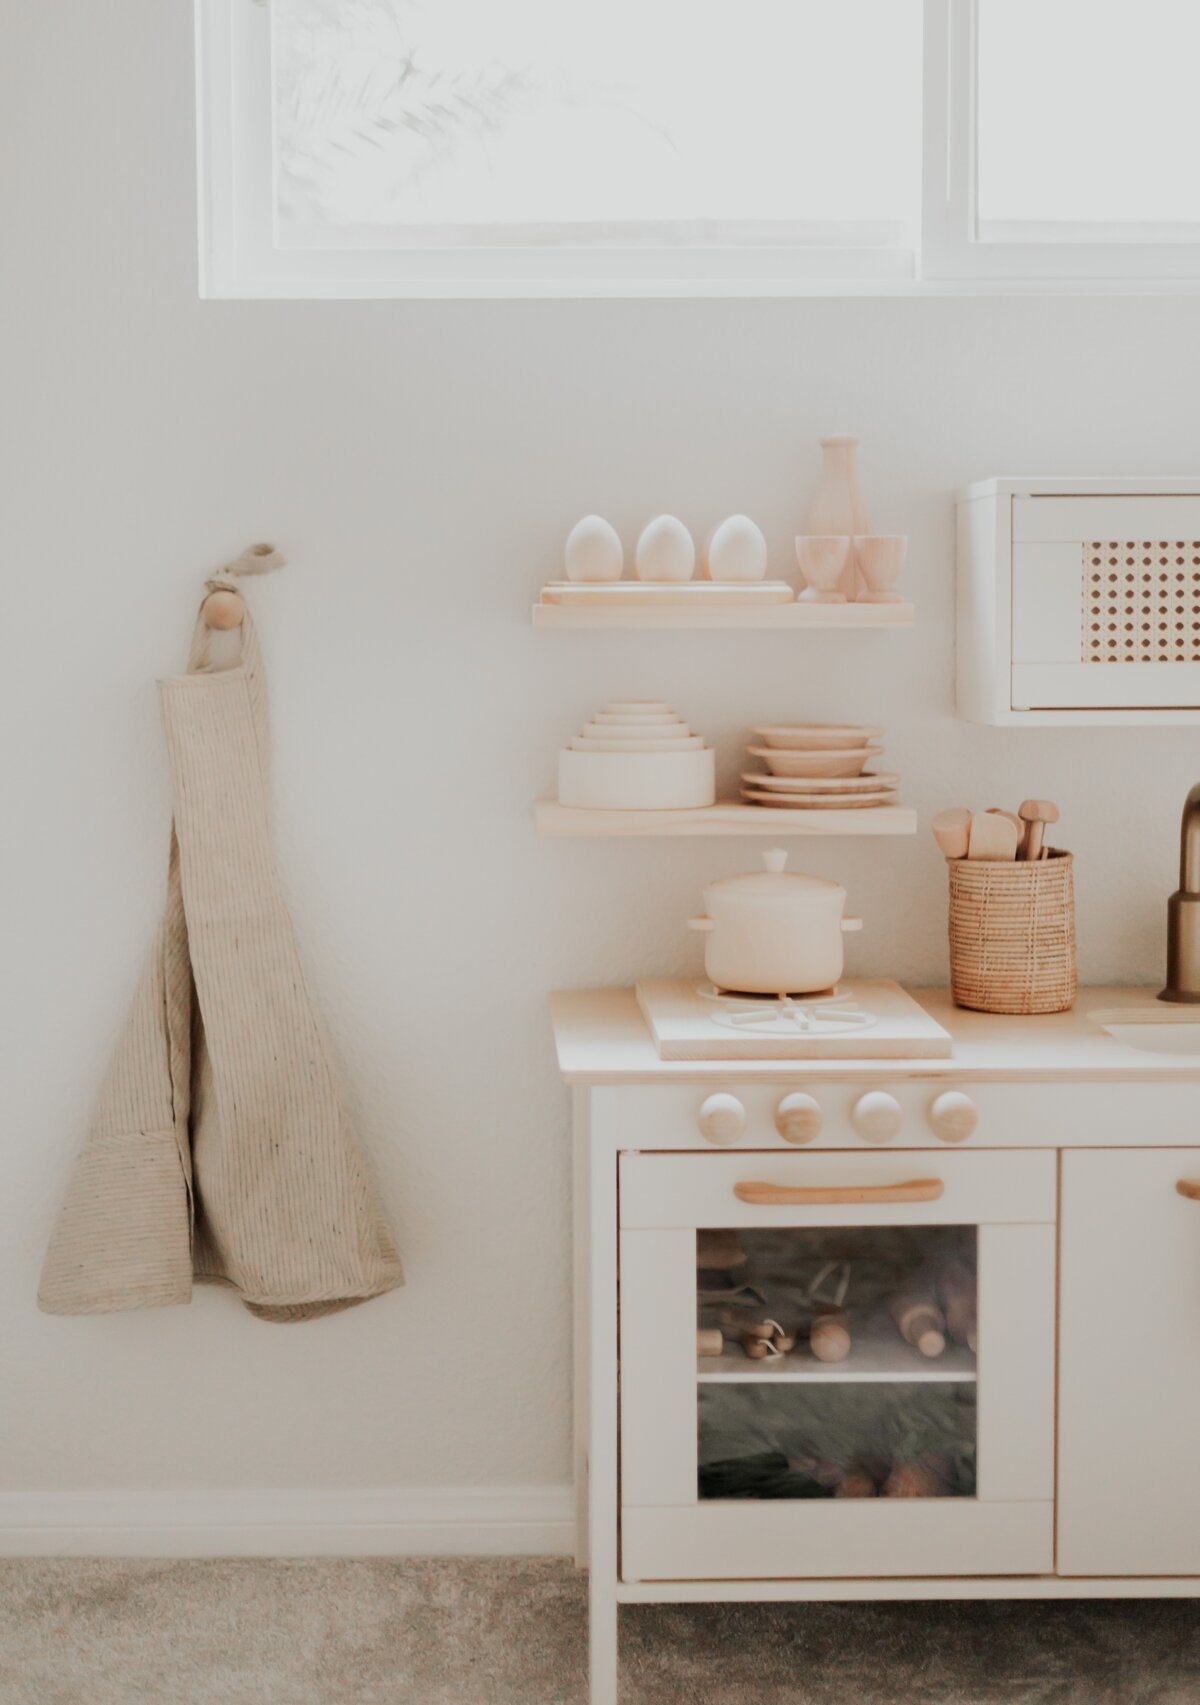
Onto the DIY floating shelves! Dan did such a great job making this part come to life for me. I wish I would’ve taken pictures of the process for this so bare with me as I try to explain and show you photos of the finished result so you can get an idea of how he made these! Feel free to ask any questions in the comments as well!


He purchased the 1x6 select pine wood from Home Depot as well as a wooden 3/8 inch dowel stick. He cut the pine wood board to desired length (we did 12inches). He used a 3/8 inch drill bit (same size as the dowel) to drill three holes on one side of the board about 2-2.5 inches deep. This will be the back side of the floating shelf. He then cut the back end of the shelf all the way through (about an inch in) so it looks like there is a strip for the back end of the shelf. He cut the dowels into three 2-2.5 inch pieces. Then he placed the dowels in each hole of the 1 inch strip that he cut off so the dowels are flush to the back but sticking out so they can go into the holes of the other part of the shelf. We screwed that 1 inch strip with the dowels in it to the wall, (we recommend using anchors with dry wall screws). Then you place and slide on the front piece of the shelf so the dowels go into the front piece.
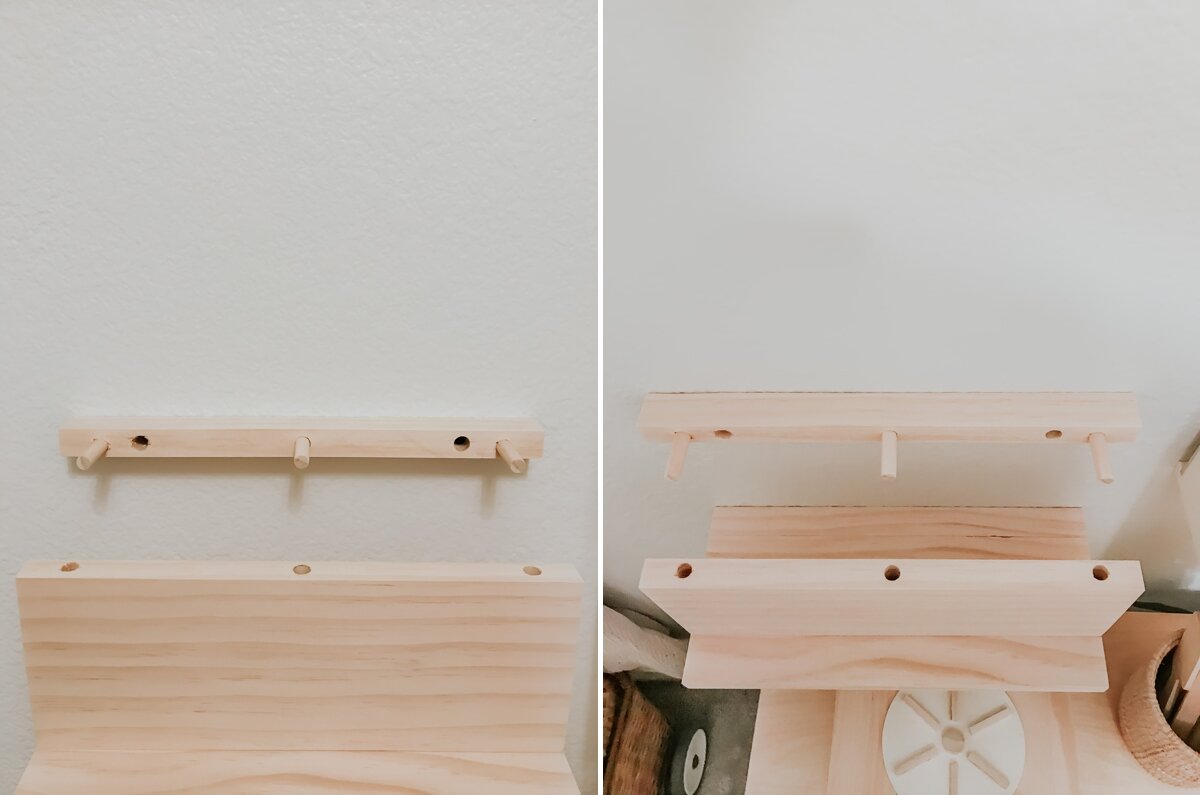
Thats all and there you have it, these little floating shelves! I just love how they came out. They are able to act as extra storage all while being aesthetically pleasing!
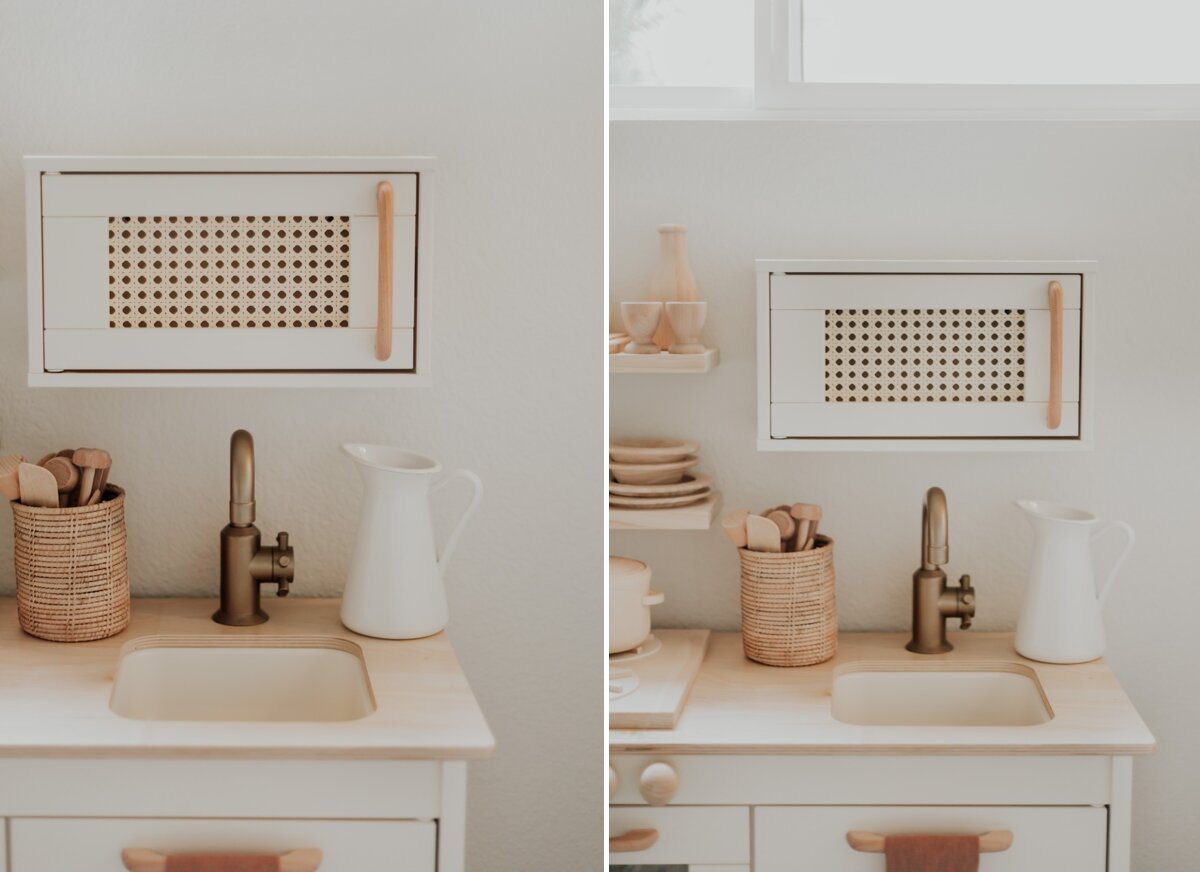
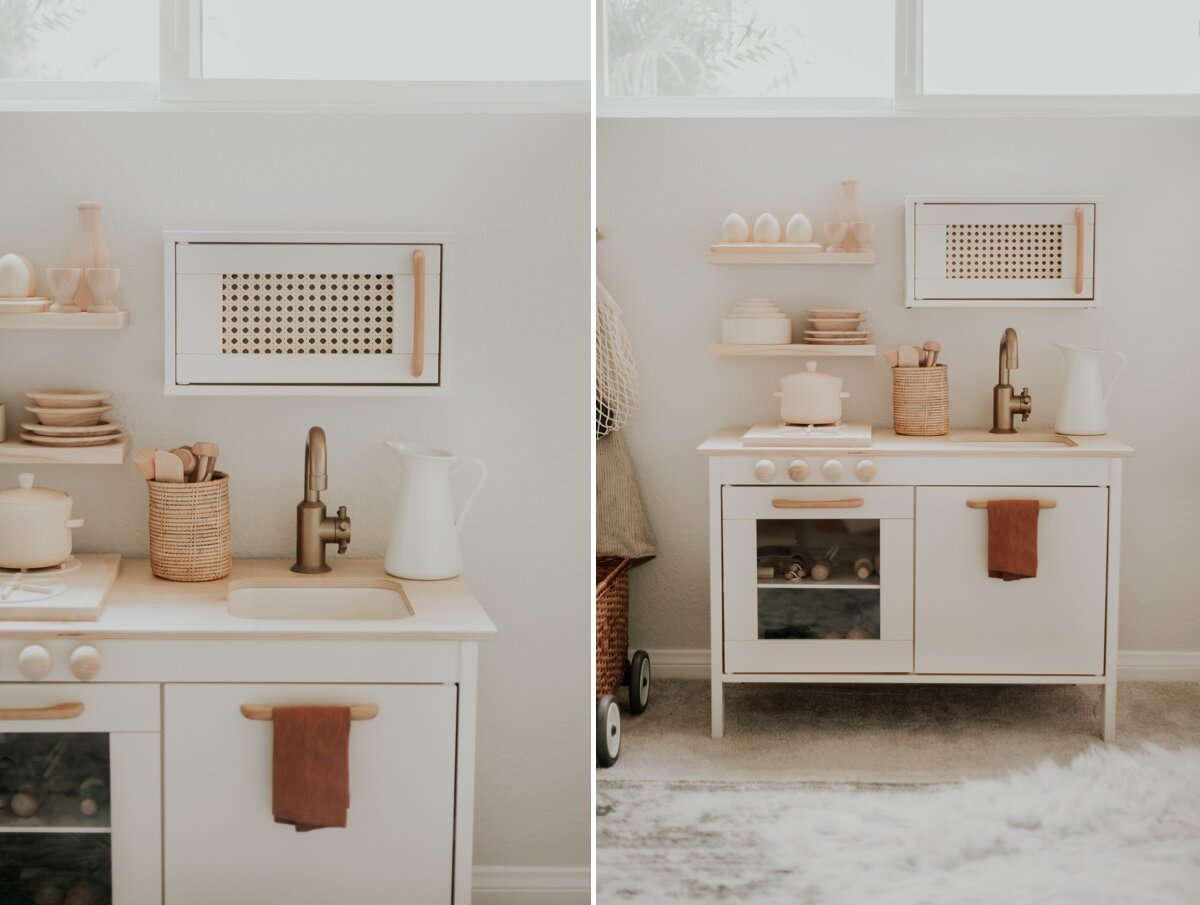

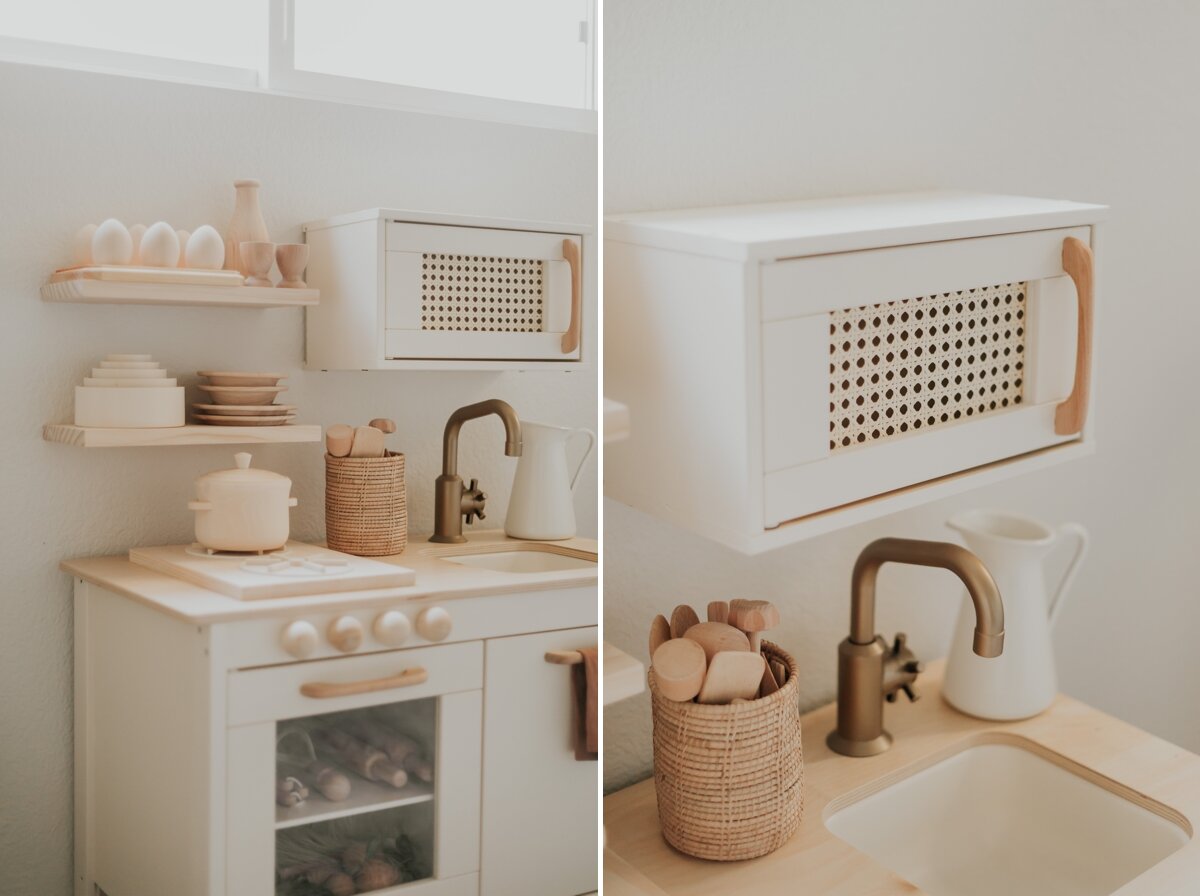


The floating microwave was kind of an idea that we knew we’d have to figure out on a whim as we go. I wanted to keep the microwave from the Ikea kitchen with out the whole top part but it wasn’t a separate piece. I don’t have specific measurements for this part, but Dan cut the wood from the Ikea kitchen and screwed those pieces together to make the microwave a separate piece. We painted the whole outside of the microwave the same color heirloom white as the kitchen, took out the clear window and used some extra rattan webbing that we had on hand from a previous project and stapled it to the back of the door. We added the wooden handle onto that also to match the other doors on the kitchen.
Juniper loves the microwave. My aunt and uncle recently got her a coffee maker to add to her growing kitchen and she sticks the cup in there and closes it and says “cockee” for coffee. I am pretty sure it’s because she sees me re-heating my coffee a million times a day in the microwave!

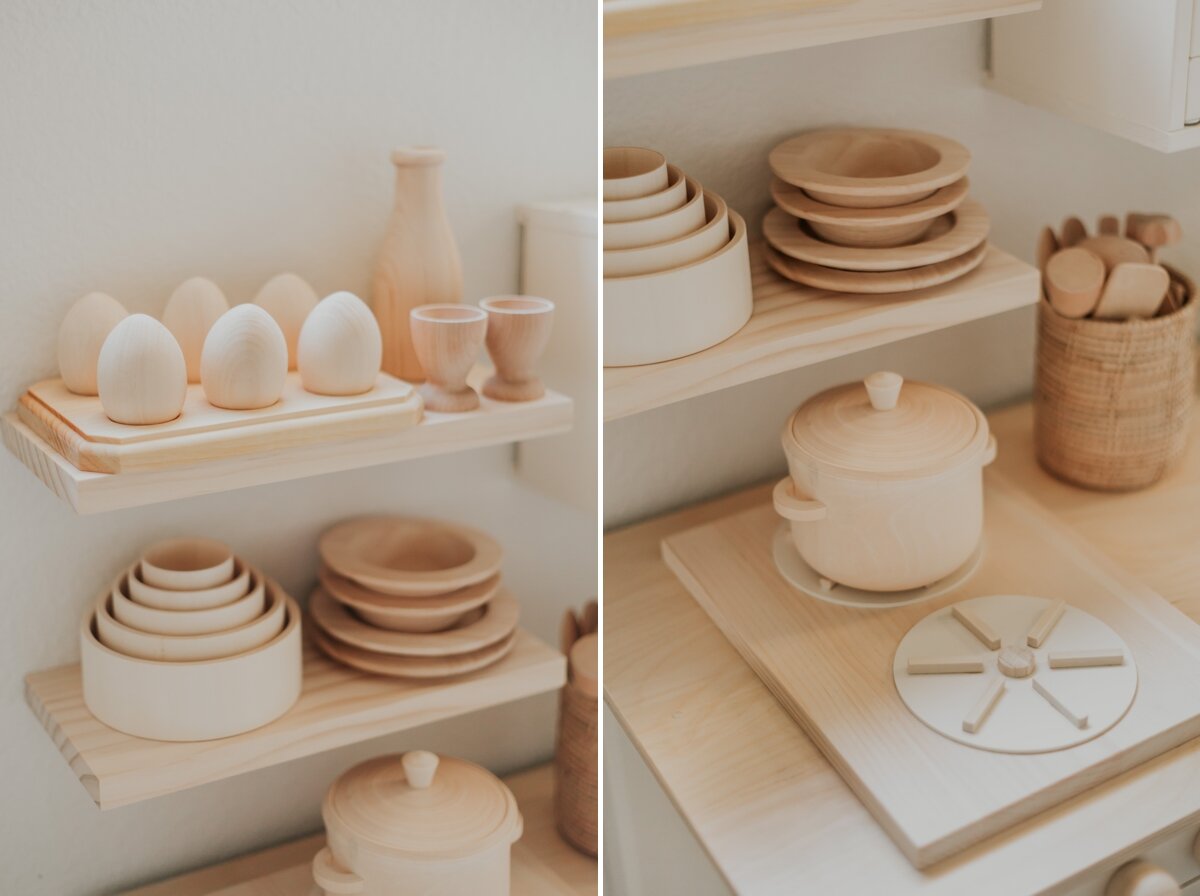
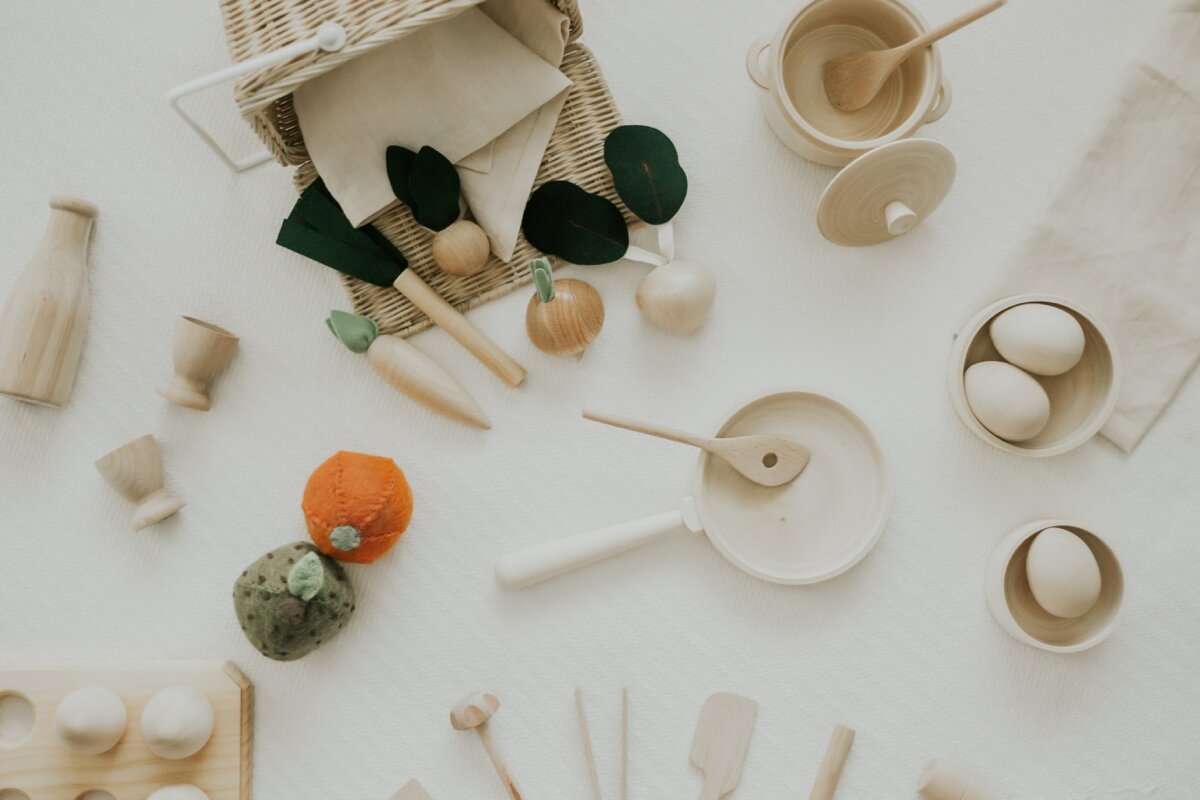
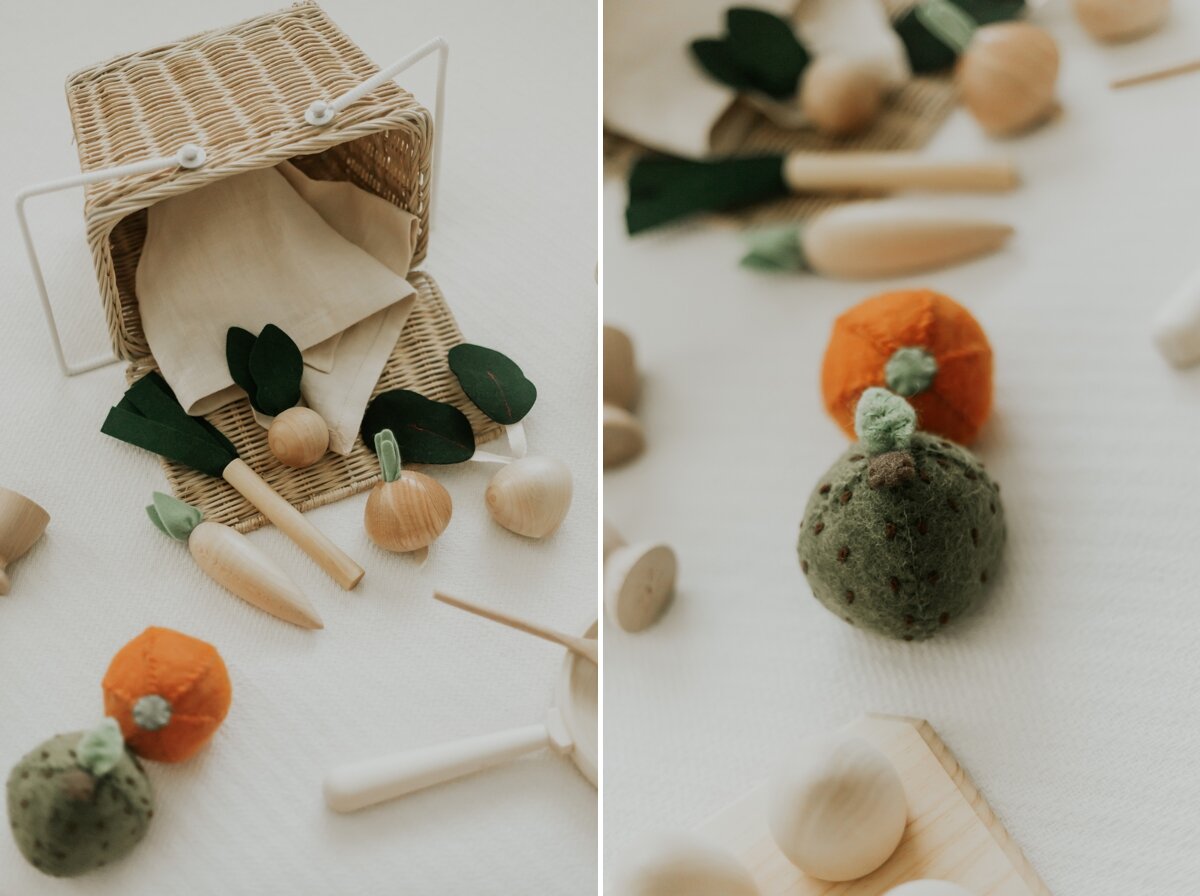
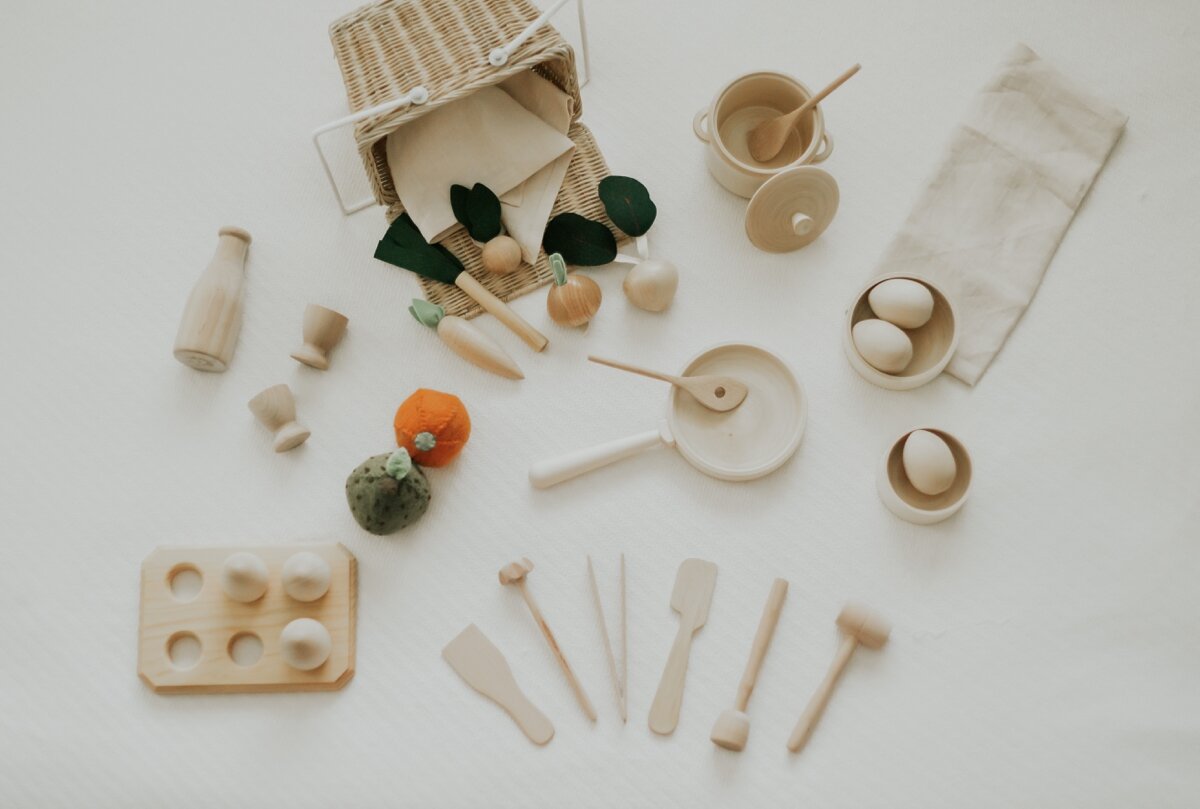
Accessories are, of course, one of the most fun parts of any play kitchen. I went on a hunt for all the beautiful wooden goodies, unique pieces that would add a special touch and fun play food with different fabric for a variety of textures and a range of colors. There are still a few items I can’t wait to add to her accessories but for now she loves it all and is having a blast playing and learning.
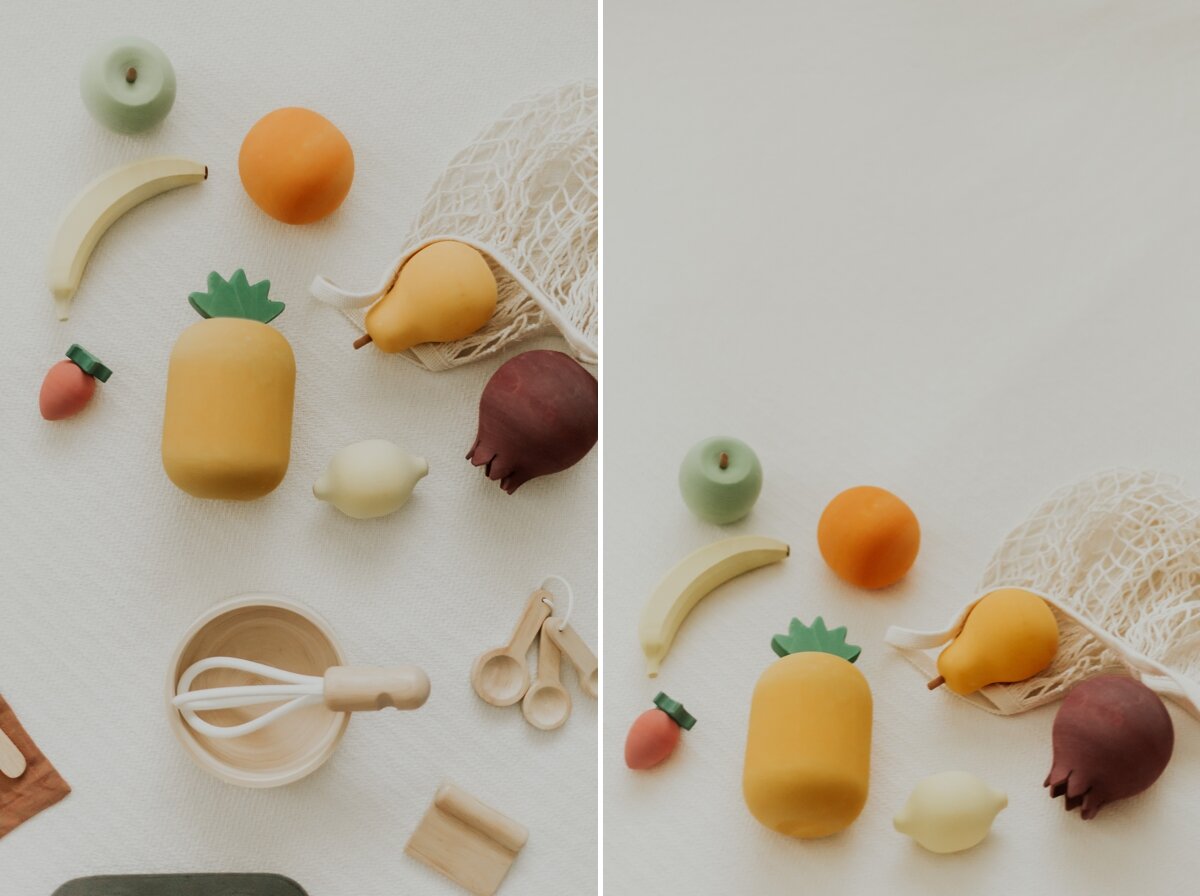
She loves to pour me some milk in her cups and then we will “cheers” and she will stir up some food in her pot and taste it and go “mmmm” as she makes us try it too. A lot of these fun accessories my parents gifted to her from some beautiful shops and will forever be so special. I also love the water based painted wooden fruit set my brother and sis-in-law got for her too she loves to carry around the apple, of course, and has been loving learning to say what each fruit is.


Doing this kitchen for Christmas was such a perfect idea because family was able to participate in getting fun stuff to add to it! Juniper received some of these special kitchen accessories as gifts that has made play time extra special! We can’t wait to continue to add to her kitchen as she grows and watch her imagination run free.


This project was truly a fun one to get to do for Juni and I am so happy you all love it as much as we do! If anyone has any questions feel free to leave a comment, send an email or send over a message via Instagram HERE. I’ve also kept a highlight for our Ikea kitchen that you can find on my Instagram page as well.


Full list of product links:
Paints:
White paint for kitchen, sink + microwave: Rust-Oleum Satin Heirloom White General Purpose Spray Paint
Gold paint for sink fixture: Rust-Oleum Universal Metallic Satin Bronze Spray Paint and Primer in One
Wooden Hardware Fixtures:
Wood for DIY floating shelves:
Select pine natural wood from Home Depot advertised as 1x6 (3/4in x 5.5inch) - cut to size
3/8inch wooden dowel stick - cut to size
Wood for DIY stove top:
Wood pieces for the burner: Home Depot 1/4 inch square dowel strip
Wood dowel for the center of burner: Home Depot 3/4 inch round dowel strip
Floating Microwave:
Kitchen Accessories:
Kids Apron: Soor Ploom Bib Apron, Feedstack
Linen napkin (small): Soor Ploom Baby Cloth Napkin In Moth
Linen napkin (normal): Soor Ploom Napkin
Linen tea towel: Soor Ploom Tea Towel In Milk
Ikea white tin pitcher: SOCKERÄRT 6” Pitcher
Wicker utensil holder: BasketryBliss Set Of Two
Wooden handmade pot + pan: ROSTOKtoys Wood Set
Wooden handmade stacking bowls: ROSTOKtoys Wood Set
Wooden plate, bowl and utensils set: Plan Toys Tableware Set
Wooden bottle and two cups set: Camden Rose Set
Wooden utensil set: Plan Toys Baking Utensils
Extra wooden cooking utensils set: Fox Run 9-Piece Set
Ikea farmers market grocery bag: KUNGSFORS Mesh Bag Set Of 2
Rattan wicker stroller/shopping cart: Olliella Strolley In Natural
Rattan wicker basket with lid: Olliella Piki Straw Basket
Wooden coffee or should I say “cockee” maker (not pictured): Imagination Generation Coffee Maker Set
Pretend Play Food:
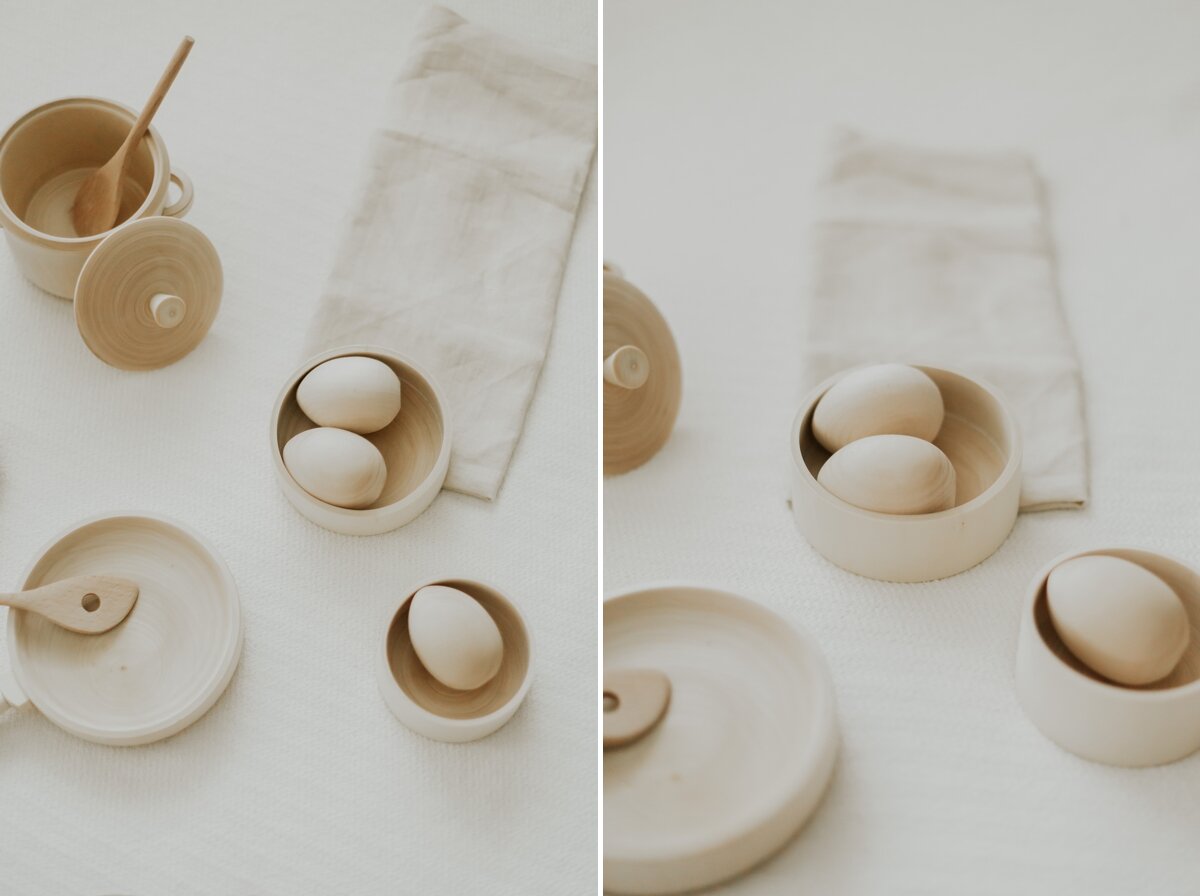
Egg Set: Wooden eggs and tray
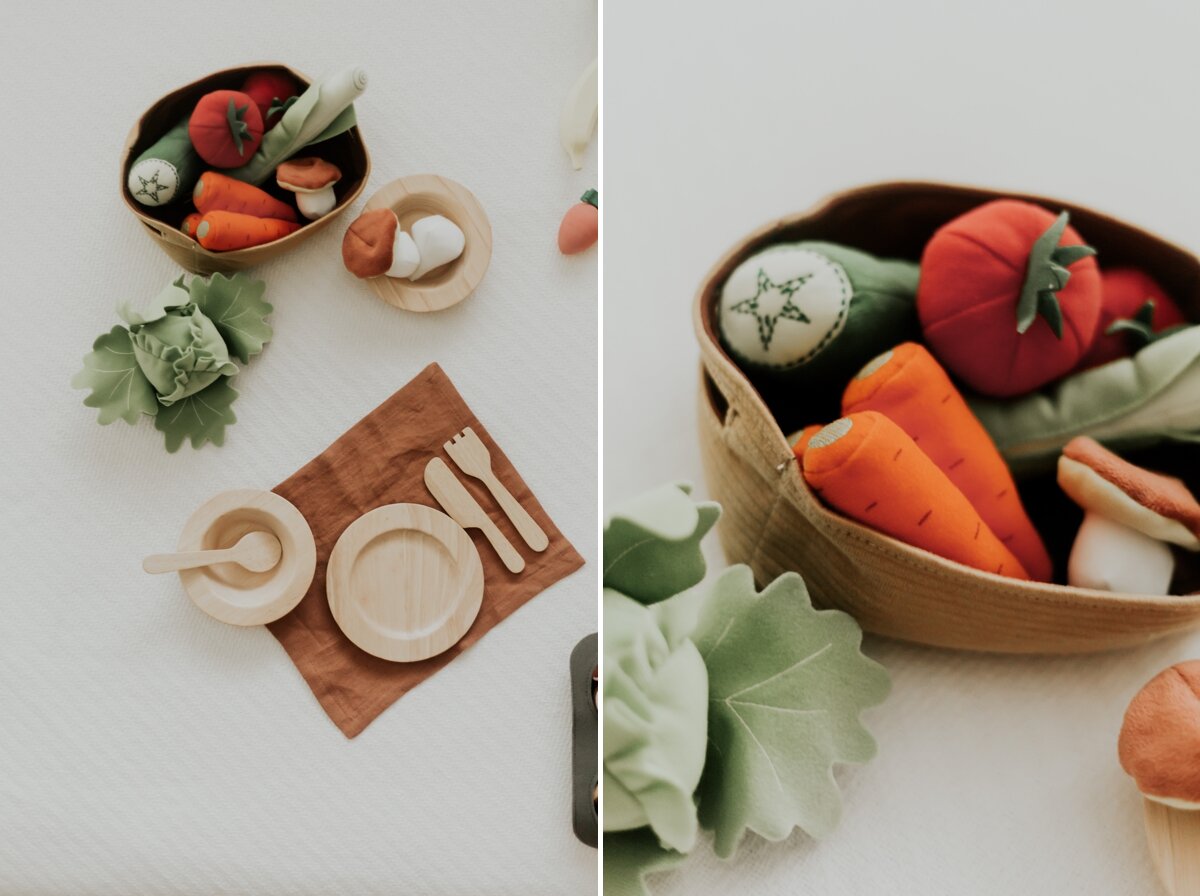
Wood and felt veggies set: Milton & Goose Play Set
Painted wood fruit set: Raduga Grez Natural Water Based Painted Fruit Set
Felt fruit set of three: Papoose handmade 3-Piece set
Felt strawberries: Antsy Pants Play Food
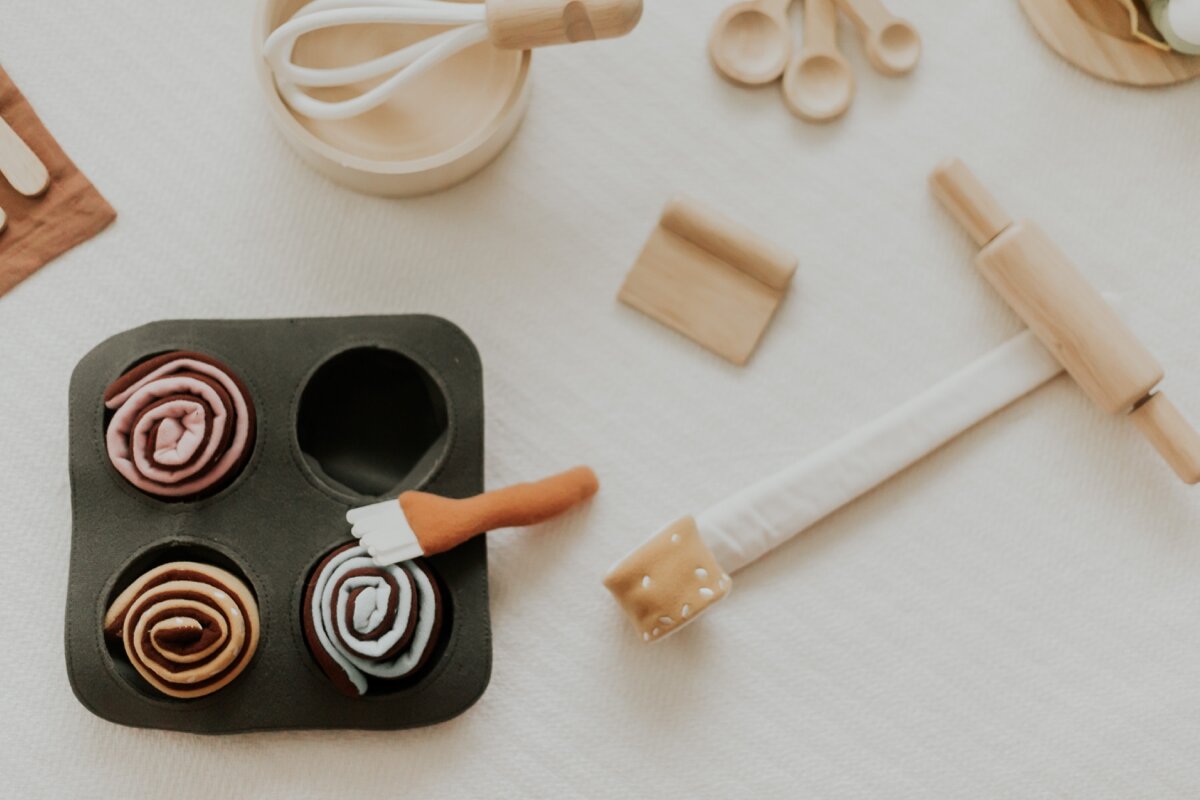
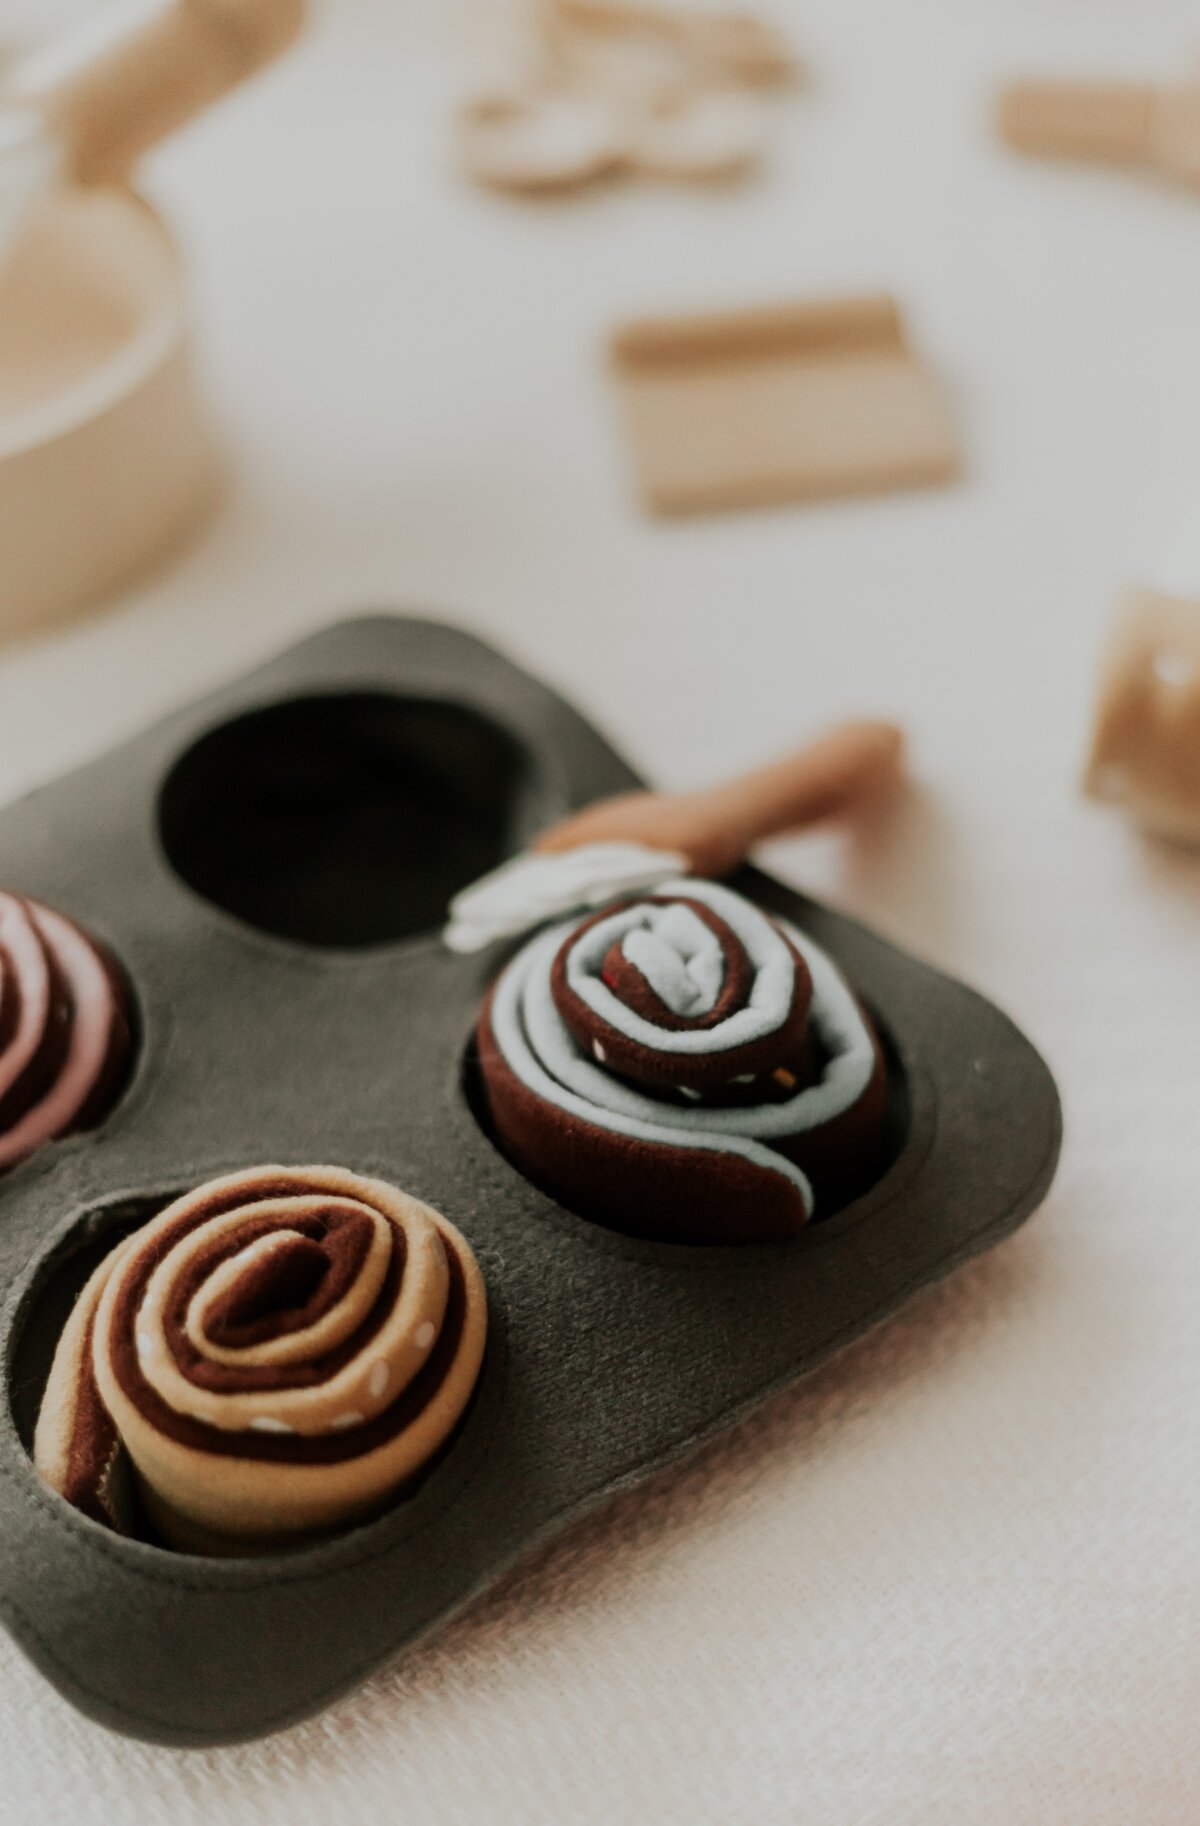
Ikea fabric cinnamon rolls: DUKTIG 6-Piece Set
Ikea fabric veggies set: DUKTIG 14-Piece Set
Ikea fabric fruit set: DUKTIG 9-Piece Set
Shop my Amazon Favorites:
Click HERE to shop some of the kitchen items on my Amazon favorites as well as some kitchen accessories we have our eye on for the future!